Pages

Wednesday, October 21, 2015

A Vest in 3 Systems - Devere 1866 First Fitting, New Forepart

In the prior post I made up a forepart and back part per instructions for make to measure in the 1866 version of Devere. I took this draft, and transferred it to a piece of Staedtler sketch paper roll. To the sketch, I added 1/4" seam allowances to the side seam and shoulder, to account for my muslin. This was then transferred to the muslin fabric, that was cut out, seamed and fitted.

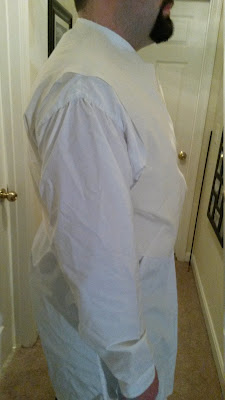
Below are pictures of that initial fit, which was rather lacking to say the least particularly at the shoulders. of the muslin over a period shirt. There is also a lot of diagonal wrinkling from the shoulders down to the bottom center forepart. (I was also unable to pin the vest straight) The last image shows a lot of wrinkling under the arm, when it is raise due to the interference of the far too long shoulder seam with the ball of shoulder; this is due to the fact that the drafts made with Devere aren't graded like modern patterns and are entirely based on the chest size. Because I am "portly" my shoulders are much smaller then my chest when compared to Devere's Proportionate man.

Also I apologize for the poor quality images, seem cell phone camera have a hard time focusing on white against, a white background.


At the suggestion of Mr. Ruley on "The Sewing Academy" forum [1], I made another draft of the forepart in which the bust was calculated against to measured curve. I took the measured curve and added 2 1/2 graduated inches to it, to come up with the calculated bust based on the proportionate man. And straight from Devere:
FOREPART.
The first point we have to notice is, that the full length is 19 3/4; that is, equal to the length of back 17 1/4, plus the distance to the top of back from the corner of the square, (2 1/2).
So below are some images of the new forepart with the old back. The fit is much improved, although as can be seen in the raised arm photograph; the issues of interference with the ball of shoulder are still present. I suspect much relief will need to be taken to reduce the shoulder-seam and enlarge the armscye.


Tuesday, October 20, 2015

A Vest in 3 Systems - Devere 1866 Initial Draft

So below is the text regarding drafting the waistcoat to measure. I have added my sizes in square-braces [ ]. In places were there are graduated measures used, I have used the scale of 1 1/3” measured inches to the graduated inches that I resolved in my prior post for my breast size multiplied by the graduated inch measure given, to determine the common inch measure to be used. i.e.:

2 1/2 graduated inches coverts to 3 1/3 common inches
2 1/2 * 1 1/3 = 3 1/3”

1 1/2 graduated inches converts to 2 common inches
1 1/2 * 1 1/3 = 2”
DRAFT TO MEASUREMENT
(Plate 14.)
The front of a Waistcoat being cut in the material, and the back only in lining, we draft the two pieces separately, instead of placing them side by side in two squares as for coats.
THE FOREPART,-FIGS. 1 & 2.
Fig. 1. First draw a long straight line, and mark on it the length of Bust to measure [25”]. Starting from the bottom; measure off for the slope of waist, the 2 1/2 graduated inches [3 1/3”] required for the back neck, this will give the bottom of side seam, and from this point measure upwards the length of SIDE to measure. Draw lines square across at all points, and mark on the bottom line half the length of WAIST to measure, plus 1 1/2 graduated inches [25].
Fig. 2. Mark all points indicated on this diagram, with a graduated measure corresponding to the Breast measure of the client, and complete the pattern by drawing the curves as before explained.
THE BACK, FIGS. 3 & 4.
Fig. 3. Draw a straight line, and mark on it the length of the CURVE to measure [20 1/4”]. Mark upwards from the bottom of the length of SIDE to measure. Draw lines square across, and mark on the bottom line, 1 1/2 graduated inches more then half the WAIST [25]: this 1 1/2 is an extra allowance given in the middle of back at the bottom only, and will afterwards be taken in by the strap and buckle, see fig. 8.
Fig. 4. Mark the other points of the back by the graduated measures, and complete it by drawing the curves, as shown on Plate 13.


So now I followed the above to get the rough shape, but I still need to draw the curvers.
HOW TO DRW THE CURVES.
The curves of a Waistcoat are very simple, and very easy to learn.
([i]Plate[/i] 13.)
In the FOREPART. The neck seam is hollowed 1 graduated inch [1 1/3'], at 2 1/4 [3"] from the shoulder point. The shoulder seam is rounded 1/4 inch [1/3"], and the side seam hollowed 1/4 inch [1/3"]. The scye is hollowed 3/8 [1/2"] at the top, and 7/8 [1 1/6"] at the bottom, from straight lines drawn from the front of scye, to the shoulder and bottom of scye.
In the BACK. The [i]back neck[/i] is curved up 3/8 [1/2"]; the shoulder and side seams are each hollowed in 1/4 inch [1/3”]: the upper part of syce is drawn square with the dotted construction line, and the lower part is hollowed in 1 1/2 [2”], from a line drawn from the top to the bottom of back scye. These curves are always to be drawn in the same manner, for all sizes and structures; of course using the graduated measures, for all sizes larger or smaller the 18 3/4 breast.

So given the fact I am rather portly I have thought to take that in consideration, by drawing the side seam straight for the back. The additional amount of allowance in the front and back is not needed as the measured draft should compensate for this, along with my long torso.:

Stout Waists, on the contrary, require extra allowances given at these places, according to the size, half being given to the front and half to the back. It should be observes that for Stout waists, the extra allowance in the front, is sloped off to nothing at the height of the breast line, and also that the side seam of the back, is for Stout men, drawn in a straight line.

So finally! Here are the drafts, not to transfer them to drafting paper and muslin. I do confess I am rather suspect of the short side, but we shall see shortly the manner in which it fits.


A Vest in 3 Systems - Devere 1866 Measurements and Math

So for any person who has enjoyed the wonder that is Mr. Devere's system, you have encountered the wonder that is graduated inches and been left mystified as to how they map to a proper measured inch. So first I considered and digested the following passage:
The GRADUATED MEASURES, are a series of measures, which are successively graduated larger and smaller than the common inch measure, and are used to draft patterns for larger or smaller sizes than the 18 3/4 breast [the breast size of his ideal proportionate man]. The “CENTRE POINT SYSTEM” can be worked correctly by DEVERE'S GRADUATED MEASURES only. All other measures are drafted on a wrong base, and would make the patterns too large.

So while I personally don't have a copy of DEVERE'S GRADUATED MEASURES handy, if I read this and other passages correctly, in addition to standing on the shoulders of giants such as Wolfie, Mr. Jim Ruley, and Mr. James Williams; it is a simple matter of ratios that “graduate” the size of the inch successively as the breast measure increases or decreases over the 18 3/4 ideal proportionate breast. I should note that all breast and waist measures are taken in half in Devere's work, so the ideal proportional 18 3/4 breast is in fact 37 1/2 inches. So the size of a graduated inch for my breast size of 25 inches should work as follows:

My Breast Measure
---------------------------   = One “graduated inch” in Measured Inches
Proportionate Breast

25”
---------- = 1 1/3 Inch
18 3/4”

So now I am left with two means of attack to draft the pattern.
1. Draft via “THE PROPORTIONATE PATTERN”
2. “DRAFT TO MEASURE”
Given that I am aware of the fact I have a longer torso then the proportionate man, and a larger stomach, I feel it may be prudent to revert to the second method of drafting to measure. That said the proportionate pattern does figure heavily in draft to measure, as measurements are taken for all points.
The principles upon which the Draft to Measure is based, are extremely simple. In forming the pattern, we rule the dimensions of all the parts of the patterns which are given by the measures, according to the measures themselves. All the other points of the patterns, which are not given by the measures, and which do not vary according to the structure of the man, are ruled by graduated measures, without any trouble whatever, copying the number of the proportionate pattern.


In my next post I shall start to actually draft my vest according to Devere's 1866 method! 

Sunday, October 18, 2015

A Vest in 3 Systems

In order to properly learn the skied art and science of cutting and refine my skills of making-up, it was put to me by Wolife, a friend and extraordinarily skilled tailor, the task of creating a vest in each of the three main tailoring manuals available to us from the 1860's. Namely, I shall endeavor to create a vest according to:
  • Louis Devere's 1866 “Handbook of Practical cutting on the Centre Point System.”
  • Wilbur S. Salisbury's 1865 “Sailisbury's System of Actual Measurement and Drafting, For All Styles of Coats, Upon Geometrical Principles.”
  • Edward Minister's 1856 “The Complete Guide to Practical Cutting.”
The first order of business was to take measures of my form per the three systems, which Wolfie was wondrously helpful in assisting me. It was of some great aid that she assisted me, as in addition to taking measures, she provided me with a great deal many pointers, such as the need to ensure the armscye allows the free motion of the ball of the shoulder. Furthermore, after working with her, it appears I had been laboring under the misguided delusion as to the location of my waist; I had placed it a two or three inches below the true natural waist. Naturally this had stymied my prior attempts at creating drafts.

It should be noted that I currently lack a well fitting vest, so all measures were taken over a period shirt. Unfortunate, but no other good manner to attack the problem.

Devere 1866


So to start I will work with drafting system which there appears to be the greatest amount of literature on, namely Devere's 1866. To begin the measures were taken as per the text outlines. I have submitted the relevant passages below.
MEASUREMENT.
(Plate 13.)
In taking the measures of a Waistcoat, we have, even for very disproportionate structures, much fewer points to ascertain than for a coat. The scye of a Waistcoat is so large, that we need take no measures for the shoulder, and the only ones indeed that are required, are shown on fig. 7: they are the first five measures of the First Series, as described for coats, and shown on Figs. 7 and 8, viz. :-
Breast, Waist, Curve, Bust, and Side.
If the customer is very particular as to the exact style required, we may add, as supplementary measures, the Depth of Opening, and the Length to bottom of Front.
If the client is ordering a coat and waistcoat at the same time, there are of course, no measures required to be taken of the waistcoat, except, perhaps, Nos. 6 and 7. But if as sometimes happens, the customer requires a waistcoat only, then the first five measures must be taken, in the same manner as for a coat, and will be fully explained in Part 1, pages 9 to 12, and plate 4.
No. 1, Breast. Taken on the Waistcoat.
No. 2, Waist. A little tighter than for a coat: say 15 1/2 for the proportionate man.
No. 3, Curve. From the top of back to the centre point, as for a coat.
No. 4, Bust. As for a coat. N.B.-In taking the bust and curve measures over a loose fitting coat, the fronts must be laid over and drawn together, so as to make the coat fit close at the back; unless this is done, the centre point cannot be marked at its proper place, and the Curve may be taken too short and the Bust too long.
No. 5, Side. As for the coat, except that it need not be taken up quite so high; as it is of no importance in a Waistcoat, if the scye should be a little lower.
----
No. 6, Opening, or length of neck seam, from the middle of back neck to the top button, measured neither too tight nor too slack, see figs. 7 and 8.
No. 7, Front Length. Measured from the centre of back neck, to the bottom of front. See figs. 7 and 8.


On calculating the Centre-Point which is essential for the later measures.
The finding of this [Centre-Point], has hitherto depended upon great accuracy of calculation, for it is place at two-fifths of the waist measure, from the seam in the middle of the back...

So given the above we determined my measures to be as follows:

Breast as Measured: 50
No. 1 Breast: 25
Waist as Measured: 46
No. 2 Waist: 46
Centre-Point [2/5 of Waist]: 9 1/5
No. 3 Curve: 20 1/4
No. 4 Bust: 26
No. 5 Side: 6
No. 6 Opening: 13 1/2

No. 7 Front Length: 24 1/4

Greetings!

Greetings And Salutations.

Introducing the latest and greatest informative blog dedicated to the Sartorial Arts.
By Royal Appointment And of London Late, Expert in Tailoring!

So all kidding aside, I intend this blog to dedicate my humble attempts to decipher the art and mystery of Tailoring, particularly the tailoring of the mid-nineteenth century.